NOTE – If using FC, ensure that your host is correctly zoned to be visible to the FlashArray (This doesn’t apply to iSCSI hosts)
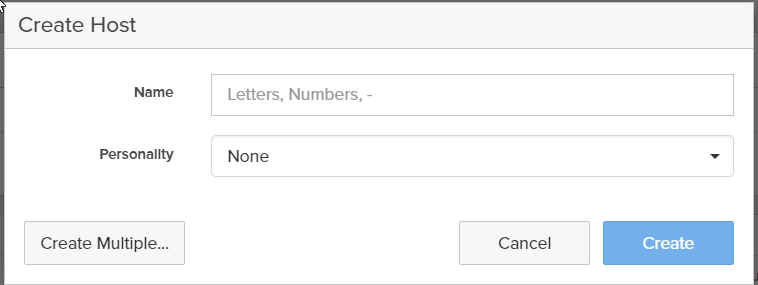
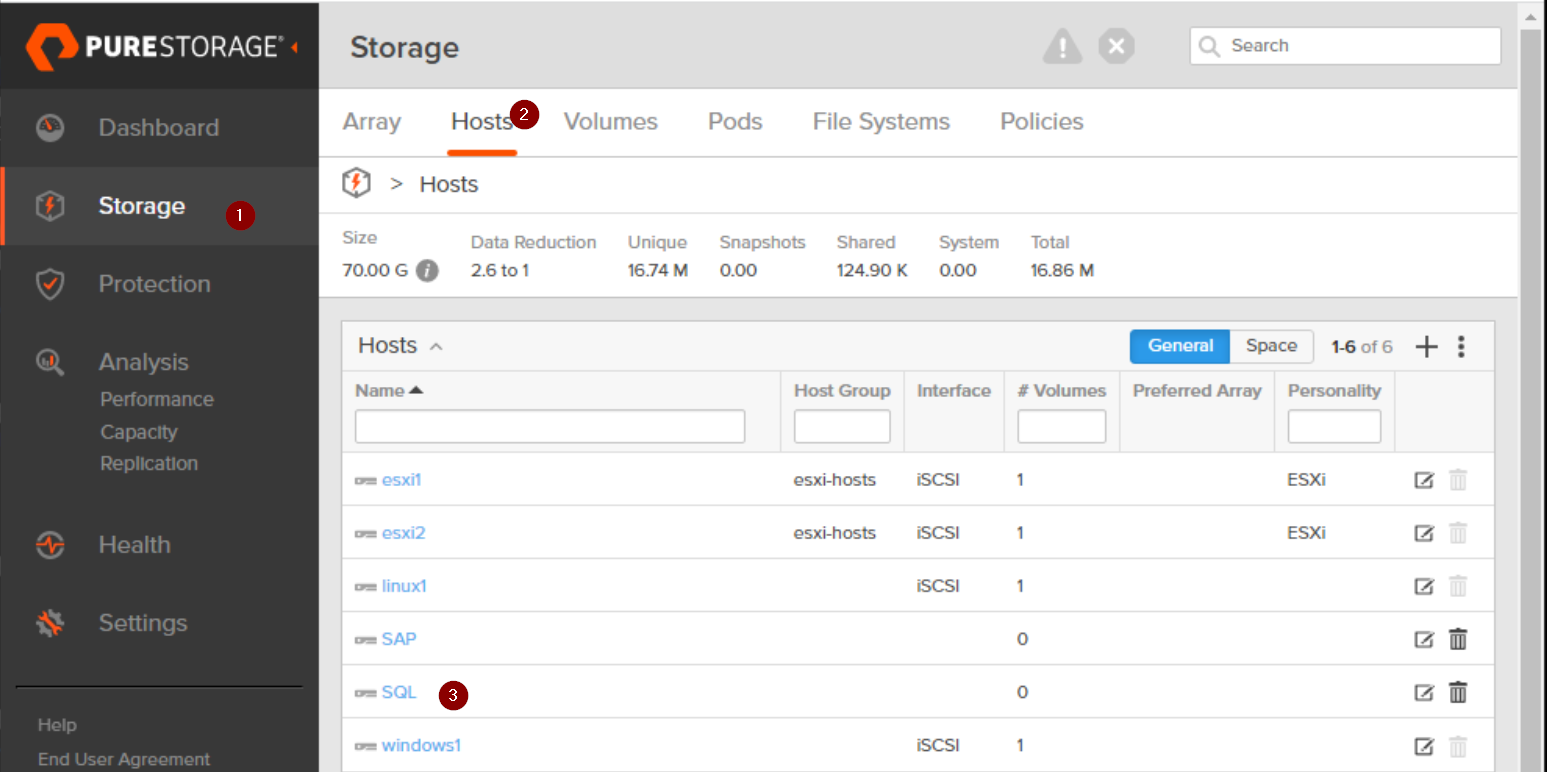
Step 1 – Create the host.
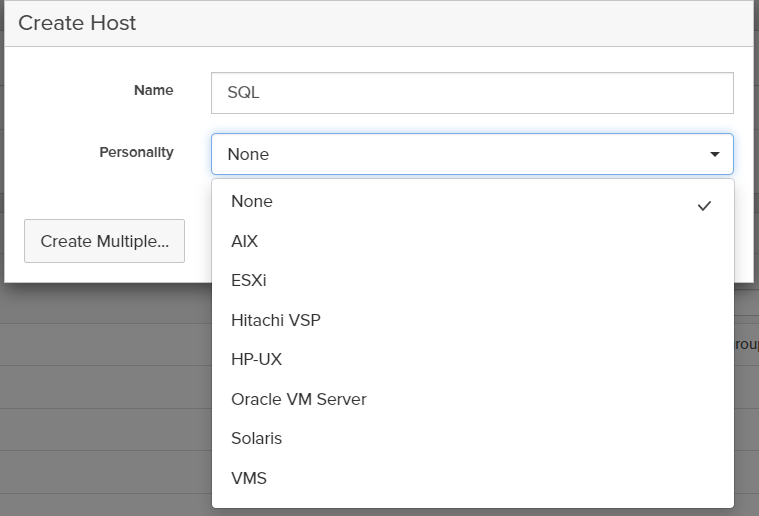
Check it host exists, if not click on the + sign (Step 3)Provide a name and a personality if applicable (Personality not necessary but allows for application specific features to be usedSQL Host example
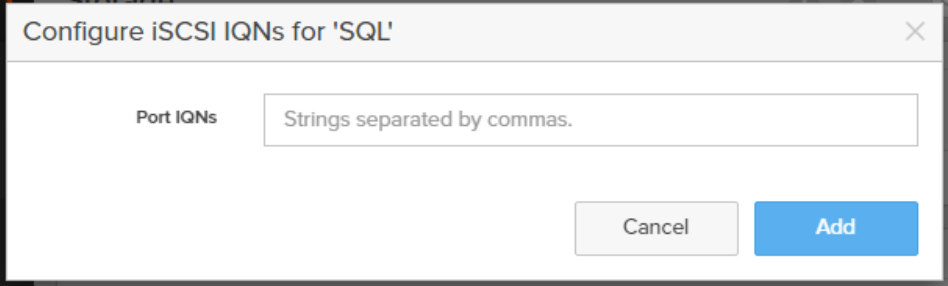
Step 2 Configure the new host.
Click on the host name you wish to configureClick on the hamburger (1) and for FC use Configure WWNs, for iSCSI use Configure IQNsFC SpecificiSCSI Specific
Once the host has been configured correctly you can now add a volume!
iSCSI configured host with IQN from esxi host (Example)
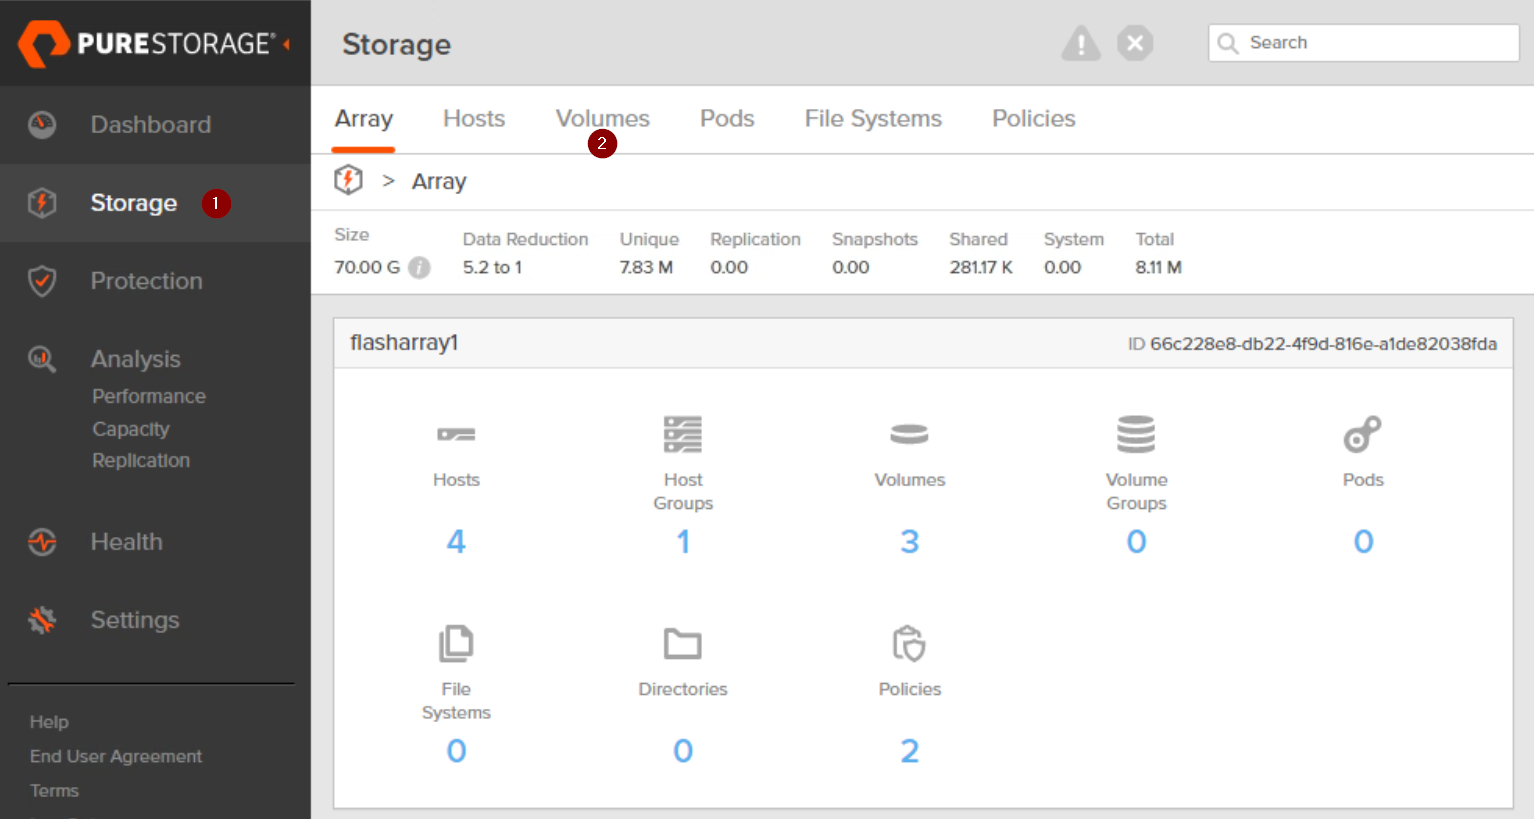
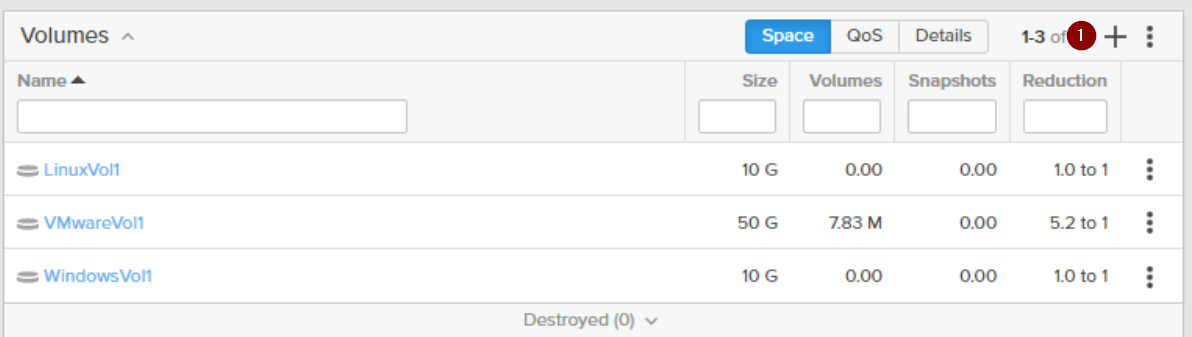
Step 3 – Configure volume for host
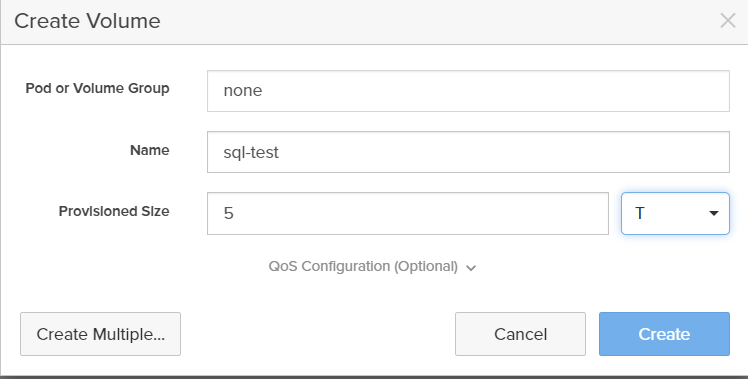
Navigate to the Storage pane, click on VolumesClick on ( + ) to create a new volumeSet up the volume. You only need a name and size!
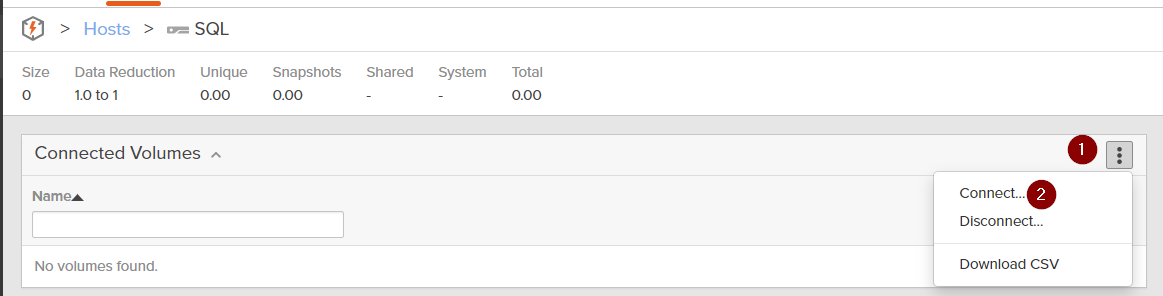
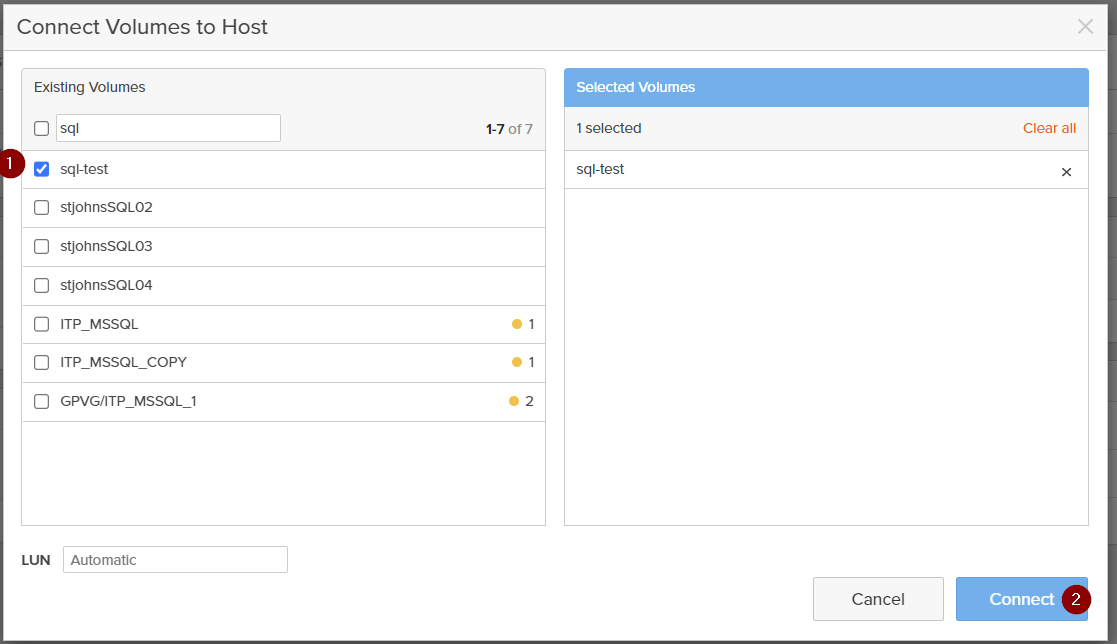
Step 4 – Connect Volume to Host!
Navigate to the host you want to add the volume to. Click on Storage on the left pane > Hosts > click on host name. Connect the volume. Click on the hamburger, then click connect.Select the volume you wish to add, then click connect.Once connected you will see the volume you created under the connected volumes section and you’re done!
Using Pure1 is the easiest way to schedule a Purity Upgrade. This method allows you to select the array to be upgraded, provides the recommended version of code and lets you reserve a time to do the upgrade.
Navigate to the cases window by selecting “Cases” under the Support section on the left hand navigation bar.
From the Cases Screen click on “Request Service” and select “Upgrade Purity Software”
From here Select the array you wish to upgrade by clicking the checkbox. Then select the version of code by clicking on the “Select a version” drop down menu
Once selected then click on “Schedule”
Select a date and time and click confirm
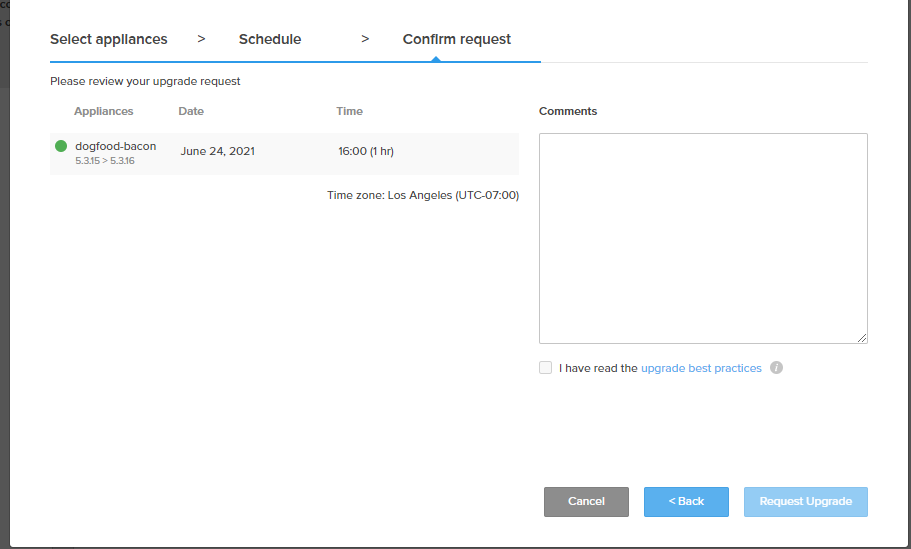
At the following screen, confirm all details are correct. Read through the best practices guide, once completed check the “I have read the upgrade best practices” box. Click “Request Upgrade” and a case will be created. Pure support will then contact you with any further requirements on their end.
And just like that you have scheduled your totally non-disruptive Purity SW upgrade. It should be around 1 hour to upgrade the software. In this time each controller is upgraded one at a time. Pure then monitors your array to ensure that there are no issues post upgrade. If you have any questions contact your System Engineer.
Ransomware is on the top of everyone’s priorities. With attacks growing more common and more devastating, we’re not seeing it as a matter of if you will be attacked, but when.
Pure Storage allows you to take control of your ransomware mitigation strategy by utilizing tools that are already available to you.
SafeMode snapshots are available on both FlashArray and FlashBlade platforms free of charge. Starting with FlashArray Purity 5.3.7 you are able to take advantage of Safemode Snapshots. Using the eradication timer we are able to provide a safe haven for snapshots that are inaccessible without a multifactor authentication method.
Pure is known for its super efficient snapshots. We’re able to instantly take a snapshot of a volume which are immutable on their own. These snapshots are unique in several ways.
Immutable – Snapshots can not be modified or encrypted after they’re created.
Efficient – Only deltas from previous snapshot are saved.
Fully Functional – Snapshots are just new volumes. Mount, read, write or snap again.
Flexible – Recover any volume from any snapshot.
Automatable – Set a schedule through policies and give yourself one less thing to do.
So since attackers cant encrypt or modify the snapshots, the next thing is to just get rid of them so you cant restore back from them. To prevent this we offer an eradication timer that prevent data from being manually deleted by everyone (even with admin rights). By default, the timer is set to 24 hours from the time a file or snapshot is deleted. With SafeMode, you are able to set that to a max 30 days for FlashArray and 400 Days for FlashBlade. This gives you ample snapshot copies to restore from.
Now the next hurdle to get through is restoring the data. Another HUGE benefit of using Pure is the fact that we are FAST. Restoring from spinning disk takes time, and depending on how much of your environment was encrypted, the time necessary to restore might not be acceptable or achievable. All the while we can throw more wrenches in, Imagine restoring a production server from backups, only to find out that the ransomware had infected that copy already. All that time is lost. With Pure, You’re able to restore exponentially quicker than you would with traditional solutions.
Backups and data protection in the past was seen as a checkbox that if it existed, was good enough. With businesses and organizations reliance on their data, and the many vectors of attack to destroy said data, data protections is quickly becoming the #1 topic of discussion. Integrating Pure into your data protection solution allows you to modernize your backup and recovery solution to being more than just a check mark but more of a value adding solution.
Welcome to my new blog. This space will be used as a newsletter / blog for any news and updates in the Pure storage world. I’ll also dabble with general storage news. Thanks again for visiting and I hope to see ya’ll around!


Recent Comments